Getting started (Mac)
How Grip works
Grip is two connected apps. Install Grip on your phone or tablet. Install Grip Desktop on the computer running Ableton Live. They connect over Wi-Fi.
Requires Ableton Live 11 or later.
1. Install Grip Desktop on your Mac
Download
Install
Drag Grip to your Applications folder.
Open Grip
macOS will prompt you to grant permissions for Grip to run in the background, so you don’t even need the Grip app open on your Mac.
Check the setup
Grip automatically installs a Control Surface script for
2. Install Grip on your phone or tablet
Get Grip
Find Grip: Control Ableton Live on the App Store (iPhone & iPad), or on Google Play (Android phone & tablet).
Install
Install Grip from the App Store or Google Play.
3. Set up Ableton Live
Grip is considered a control surface for Live, just like Push or any MIDI controller.
Open Live
Open Live on the same Mac as the Grip app.
Open Settings
Go to Live → Settings (or press ⌘,)
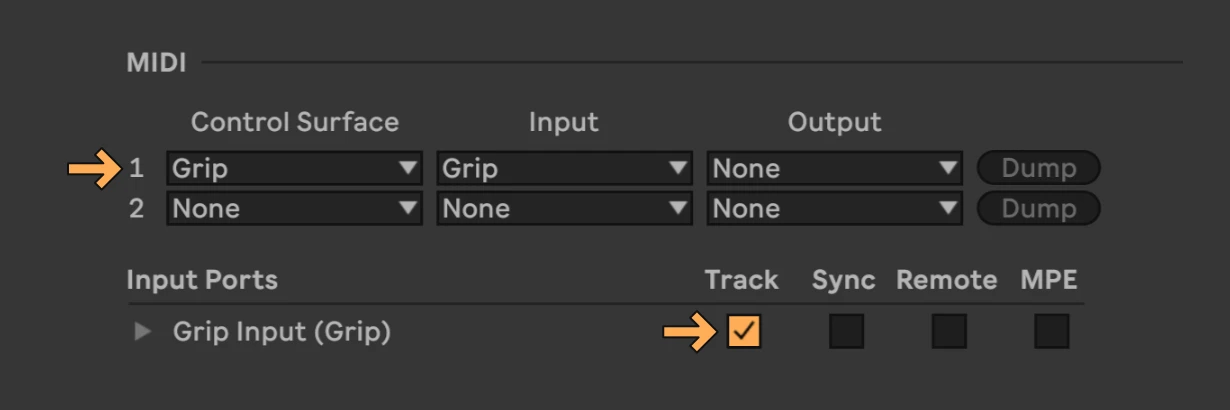
Choose Grip as a Control Surface
In the Link, Tempo & MIDI tab, choose Grip as a Control Surface.
Choose Grip as a MIDI input
In Input Ports, check the Track checkbox for Grip Input (Grip). If you don't see Grip Input (Grip), contact [email protected] for help.
4. Connect from your phone or tablet
Get on Wi-Fi
Make sure your phone and Mac are on the same Wi-Fi network.
Open Grip
Open Grip on your phone or tablet. It should connect automatically. If it doesn't, check the Grip app on your Mac.